
Amazon Seller Account Setup India: Requirements, Registration & Complete Guide
 July 21, 2026
 Yashwardhan Singh
 0 Comments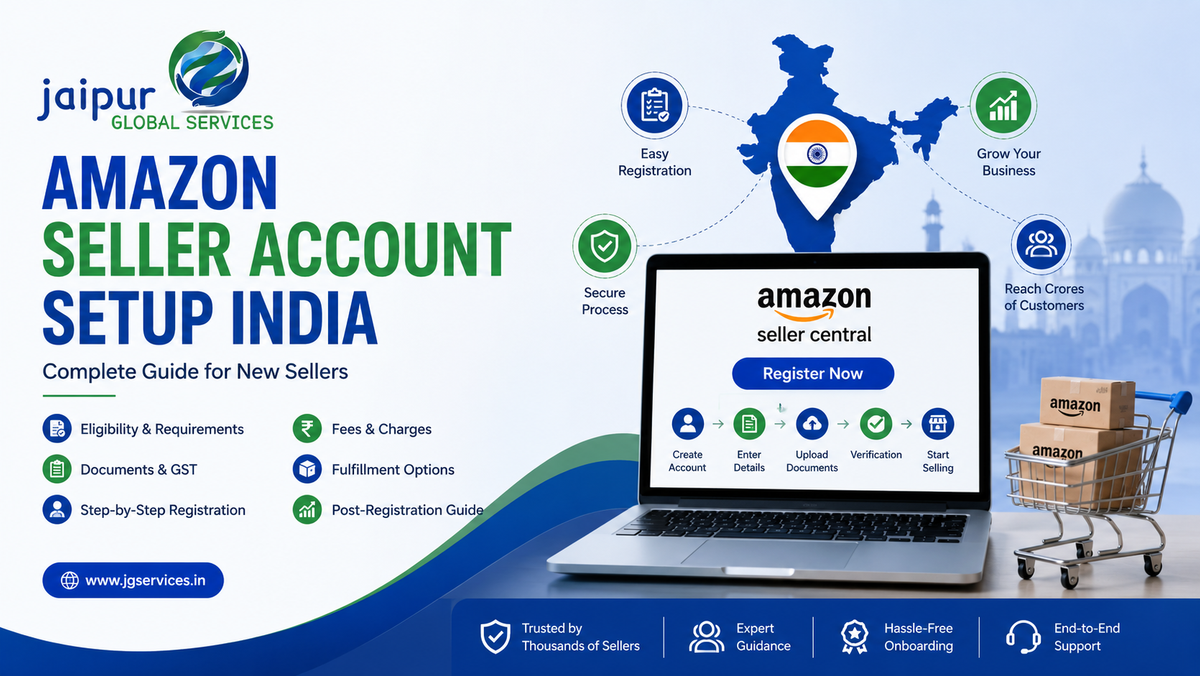
If you're looking into Amazon seller account setup India, you're probably a small business owner, manufacturer, or someone running an offline business who's decided it's time to sell directly to customers online. That's a good instinct — but registration is just the entry point. What actually matters is what you do once the account is live.
This guide covers the whole process: who can sell on Amazon India, what GST and documents you'll need, how to register step by step, what Seller Central actually does, real seller fees after the March 2026 changes, how FBA, Easy Ship and Self Ship differ, how to list products properly, and a clear checklist for what to do once your account is approved. We'll also cover the mistakes that trip up most first-time sellers and a simple way to check whether a product will actually be profitable before you commit to it.
A quick note on accuracy: Amazon India's fees and policies change periodically, and GST rules are set by the government, not Amazon. Everything here reflects current information at the time of writing, but always confirm exact numbers on Seller Central or the GST portal before making pricing or registration decisions.
Who Can Sell on Amazon India?
Amazon.in is open to individuals, sole proprietors, partnerships, LLPs, and private limited companies. You don't need to be a large, established brand to register — a huge number of active sellers on Amazon India are small manufacturers, home-based businesses, and first-time entrepreneurs.
To register, you'll generally need:
- A PAN card, in your name if you're an individual or proprietor, or in the business's name for partnerships, LLPs, and companies
- GST registration, for most product categories (see the GST section below for the exceptions)
- An active bank account
- A working mobile number and email address
- A pickup address where Amazon or your courier can collect inventory
There's no requirement to register a company before you start. A sole proprietor with a GSTIN can register and sell just as legitimately as a private limited company — the account type doesn't determine how seriously Amazon treats your business.
Amazon Seller Account Requirements India
Let's go through the requirements properly, since this is what most people search for. Amazon doesn't ask every seller for an identical set of documents — what's needed can vary by product category, business structure, and how the verification system flags your application — but here's the baseline.
GST and PAN
For most product categories, you'll need a valid GSTIN. PAN is mandatory for everyone, whether you're registering as an individual or a registered business entity. Your GST details need to be linked correctly to your PAN, since mismatches here are one of the most common causes of delayed verification.
Active bank account
A bank account that can receive payments, ideally in the name of the business or the individual seller registering the account. Amazon may run a small verification transaction to confirm the account is active.
Business and contact details
Your legal business name, business type, registered address, and a working phone number and email Amazon can reach you on.
Pickup address
The address where inventory will be collected if you're using Easy Ship or a courier pickup. This needs to be accurate and serviceable — an address that couriers can't reliably reach creates ongoing headaches later.
Product and category information
Details about what you plan to sell. Some categories are open to all sellers, while others require additional approval, certification, or documents before you can list — this is worth checking early rather than after you've already prepared inventory.
Requirements can shift depending on your specific situation, and Amazon may request more information mid-application if something needs clarifying. Treat this as a starting point, not a guaranteed checklist.
Do You Need GST to Sell on Amazon India?
This is one of the most searched questions around Amazon India seller registration, and it deserves a proper answer rather than a blanket yes or no.
For most sellers offering taxable goods, GST registration is required before you can list products and start selling — this applies regardless of your turnover, because e-commerce operators like Amazon are required to collect tax at source on sales made through the platform, which creates a registration obligation from your first sale rather than after crossing a turnover threshold that applies to some other kinds of businesses.
There are exceptions. Sellers dealing only in GST-exempt goods — books are the commonly cited example — may be able to register using just their PAN, without a GSTIN. Whether your specific products qualify for this exception depends on how they're classified under GST law, so it's not something to assume without checking.
A few practical points worth knowing:
- GST registration itself is free and done through the official GST portal, and generally takes about a week when your documents are in order
- Once registered, you're expected to collect GST on applicable sales, file periodic GST returns, and follow invoicing rules
- If you use FBA and your inventory gets stored in fulfilment centres across different states, you may need GST registration reflecting those states depending on how your business operates
- Amazon verifies your GST details against your PAN before your listings go live, so getting this right at registration saves time later
This isn't a substitute for proper tax advice. GST requirements can depend on your product category, business structure, and how you're operating, so it's worth confirming your specific obligations with a tax professional or through official GST guidance before you register.
How to Create Amazon Seller Account India
Here's the step-by-step process, with what to prepare and what to expect at each stage.
Step 1 – Start Amazon seller registration
Head to Amazon's seller registration page and begin the sign-up process. Before you start, have your PAN, GST certificate, bank details, and pickup address ready — having everything on hand in one sitting avoids a half-finished application sitting incomplete for days.
Step 2 – Sign in or create your Amazon account
You can register using an existing Amazon account (the same one you might already shop with) or create a new one specifically for selling. Many sellers prefer keeping their seller account separate from a personal shopping account.
Step 3 – Enter GST and business information
Provide your legal business name, business type, and GSTIN. Make sure the spelling of your name and business details match exactly across every document — small mismatches between your PAN, GST certificate, and application are one of the most common reasons registrations get delayed.
Step 4 – Verify your GST details
Amazon checks your GST information against official records. If everything matches, this step usually clears quickly. If there's a discrepancy, you'll need to correct it before moving forward.
Step 5 – Choose your Amazon store name
Pick a store name that represents your brand. This is what customers will see, so it's worth choosing something clear and memorable rather than rushing through this step.
Step 6 – Add your pickup address
Enter the address where your inventory will be collected for shipping. Double-check that it's accurate and actually serviceable by couriers in your area.
Step 7 – Choose your shipping method
Decide between FBA, Easy Ship, or Self Ship (covered in detail below). Many new sellers start with Easy Ship to test demand before committing to FBA.
Step 8 – Add your bank account
Enter your bank account details for receiving payments. The account name should match your business or personal name on file to avoid payout delays.
Step 9 – List your products
Once your account is approved, start adding products with accurate titles, images, descriptions, and pricing. This is where the real work of selling begins.
Step 10 – Launch your Amazon store
With your first listings live, you're officially selling. From here, the focus shifts to optimising listings, managing inventory, and building visibility — which we'll cover in the sections below.
How to Create Amazon Business Account in India: A Quick Clarification
A lot of people searching for "how to create Amazon business account in India" actually mean an Amazon seller account — the one that lets you list and sell products on Amazon.in. It's worth clearing up the confusion, because Amazon uses "Amazon Business" for something different.
Amazon Business is a separate buyer-side platform aimed at businesses that want to purchase supplies, equipment, or bulk goods from Amazon, with features like GST invoicing on purchases and business pricing. It's for buying, not selling.
If your goal is to list and sell your own products to customers on Amazon.in, what you actually need is a seller account, created through Seller Central — the process described in this guide. If you're not sure which one applies to you: are you trying to sell products, or purchase them for your business? The seller account is what you want if it's the former.
What Is Amazon Seller Central India?
Amazon Seller Central is the dashboard you'll use to run your entire Amazon.in business once you're registered. It's not just a registration portal — it's where the actual day-to-day work happens.
Inside Seller Central, you can:
- Create and manage product listings
- Track inventory and manage FBA shipments
- View and process orders
- Set and adjust pricing
- Access payment reports and disbursement details
- Run Amazon PPC advertising campaigns
- Monitor account health and seller performance metrics
- Handle customer questions and returns
- Review sales, traffic, and advertising reports
Learning your way around Seller Central India matters more than most new sellers expect. This is where you'll spot problems early — a dip in conversion, a rising return rate, a policy violation — before they become bigger issues. Sellers who check in regularly tend to catch and fix problems faster than those who only log in when something's already gone wrong.
How Much Does It Cost to Sell on Amazon India?
There's no single fixed fee for selling on Amazon India — the real cost depends on your product category, price, size, weight, and fulfilment method. As of the March 2026 fee update, Amazon expanded zero referral fees to products priced under ₹1,000 across more than 1,800 categories, covering apparel, footwear, home and kitchen, beauty, toys, grocery, and several others. For products above ₹1,000, referral fees vary by category, generally somewhere between roughly 2% and 15%, though some categories run higher — always check the current rate for your specific category on Seller Central rather than relying on older articles.
Cost
What it means
Referral fee
A percentage of the sale price, now zero for many products under ₹1,000, and category-dependent above that
Closing fee
A fixed fee that varies by price band — recently reduced for lower-priced products under the March 2026 update
Shipping/fulfilment fee
Charged on Easy Ship and Self Ship orders based on weight and distance, or included in FBA fulfilment fees
FBA/storage fees
Applicable if you use FBA — covers warehousing, picking, packing, and shipping by Amazon
Advertising (PPC)
Optional but often necessary spend to gain visibility, especially for new listings
Other costs
Packaging, returns processing, and any category-specific compliance costs
The total cost of selling depends on your product category, your selling price, the size and weight of the item, which fulfilment method you use, your order volume, how much you spend on advertising, and your return rate. A t-shirt priced at ₹299 and a kitchen appliance priced at ₹4,000 will have very different fee structures — there's no shortcut around checking the specifics for your own catalogue.
Amazon FBA vs Easy Ship vs Self Ship
Amazon gives Indian sellers three main ways to get products to customers, and each one suits a different situation.
FBA (Fulfilment by Amazon): You send inventory to Amazon's warehouses, and Amazon handles storage, picking, packing, shipping, and most customer service and returns. Listings become eligible for the Prime badge, which tends to help conversion. In exchange, you pay fulfilment and storage fees, and you're committing stock in advance.
Easy Ship: You store inventory yourself, but when an order comes in, Amazon arranges pickup and handles delivery through its logistics network. You still pack the order and generate the label, but you're not managing courier relationships yourself.
Self Ship: You handle everything — storage, packing, and delivery through your own courier arrangements. This gives you the most control but also the most operational responsibility.
Factor
FBA
Easy Ship
Self Ship
Inventory stored by
Amazon
Seller
Seller
Delivery
Amazon
Amazon
Seller/third-party courier
Operational control
Lowest — Amazon manages most of the process
Moderate — you pack, Amazon delivers
Highest — you manage everything
Main consideration
Storage costs and inventory commitment upfront
A middle ground for sellers who want delivery support without giving up inventory control
Best for low-volume, fragile, or restricted items where full control matters
None of these is automatically the best choice. Many established sellers use a mix — FBA for their fastest-moving, highest-margin products, Easy Ship for mid-volume items being tested, and Self Ship for fragile or oversized products that don't suit Amazon's standard handling. A common pattern for new sellers is starting with Easy Ship to test real demand before committing inventory to FBA.
How to List Products on Amazon India
A seller account by itself doesn't generate sales. The listing is what actually does the work of convincing a customer to buy — and that means covering more than just uploading a product photo and a price.
First, understand the difference between adding an offer to an existing product and creating a new listing. If your exact product already exists on Amazon (say, a nationally known brand you're reselling), you add your offer to that existing listing. If your product is unique — your own brand, your own manufacturing — you'll create a brand-new listing, which requires more setup, including product identifiers.
Product identifiers matter here. Every listing needs an ASIN (Amazon's own product identifier, generated automatically when you create a new listing), and depending on your category, you may need a GTIN, UPC, or EAN — standard barcodes used to identify products globally. Some categories allow GTIN exemption for private-label sellers under Brand Registry, but this needs checking per category.
Beyond the technical setup, focus on:
- Product research, understanding what's actually selling in your category and at what price point, before finalising your own pricing
- The right category, since a miscategorised product can hurt visibility and sometimes violate policy
- A clear title, bullet points, and description that explain what the product is, who it's for, and what makes it worth buying
- Good images, since photos are often the single biggest factor in whether a customer clicks through
- Relevant search terms, so your listing actually shows up when customers search
- Competitive, well-calculated pricing — not a guess, but a number based on your actual costs and margin
- Product variations set up properly if you sell in multiple sizes or colours
- Reviews, which build credibility for new listings over time
- A+ Content and Brand Registry, if you have a registered trademark — these unlock richer product pages and additional protection for your brand
A seller account gets you access to the marketplace. The listing is what actually sells the product.
Should New Amazon India Sellers Use PPC?
Most new listings need a push to get visibility, and Amazon PPC (Pay-Per-Click advertising) is usually the way sellers get that early traction.
- Sponsored Products are the standard entry point — ads that appear in search results and on product pages, tied to keywords or products.
- Automatic campaigns let Amazon match your ads to relevant searches for you, which is useful early on to gather data about what actually converts.
- Manual campaigns give you direct control over which keywords you're bidding on, once you know which ones work.
- Search term reports show exactly what customers typed before clicking your ad — useful data to feed back into both your ads and your listing itself.
- Budget control should start cautious while you learn what's working, then scale based on real performance.
- ACOS and TACOS (advertising cost of sale, and total advertising cost of sale) are the standard metrics for judging whether your ad spend is sustainable against your sales.
Here's the honest part: PPC cannot fix poor product quality, a weak listing, uncompetitive pricing, poor reviews, or a product that simply doesn't fit what customers on Amazon are looking for. Advertising amplifies what's already working — it doesn't create demand out of nothing. If a listing isn't converting organic traffic well, adding ad spend on top of it usually just burns money faster.
How to Check Profit Before Selling on Amazon India
Before you commit inventory to any product, it's worth working out whether it's actually going to be profitable — not after you've launched, but before.
A simple way to think about it:
Selling Price − Amazon Fees (referral + closing + shipping/fulfilment) − Product Cost − Packaging − Advertising (estimated) − Returns/Other Costs = Estimated Profit
Here's a simple fictional example to illustrate the logic (not actual current Amazon rates — always check your specific category on Seller Central):
Say you're selling a home décor item at ₹899. Your product cost might be ₹350, packaging around ₹15, an estimated ₹80 in fulfilment and closing fees, and you set aside ₹60 for advertising. That leaves roughly ₹394 before accounting for any returns. If your return rate in that category tends to run high, that number shrinks further once you average it across all your sales, not just the successful ones.
The point of doing this exercise before launch, not after, is that it's much easier to walk away from a product that doesn't pencil out than to keep pushing inventory you've already paid for and shipped. Sellers who skip this step often discover their margins are thinner than expected only after they've already committed stock and ad spend.
What to Do After Creating Your Amazon Seller Account
Registration is the beginning, not the finish line. Here's a practical checklist for what comes next.
- Complete your Seller Central setup — notification preferences, payment settings, and any additional details Amazon requests.
- Add your products with complete, accurate information rather than rushed placeholder listings.
- Optimise your listings for how customers actually search, not just how you'd describe the product internally.
- Set competitive pricing based on your real cost calculation, not a rough guess.
- Choose your fulfilment method — FBA, Easy Ship, or Self Ship — based on your product and how confident you are in demand.
- Plan your inventory realistically, especially if you're manufacturing or sourcing to order.
- Set up shipping properly, whether that's an FBA shipment plan or a reliable courier relationship for Easy Ship or Self Ship.
- Launch PPC where appropriate, once your listings are actually ready to convert.
- Monitor orders daily, especially in the first few weeks.
- Track your account health regularly, not just when Amazon flags something.
- Manage customer questions promptly — response time affects both customer satisfaction and account metrics.
- Monitor returns, since return patterns often point to a real issue with the product, listing, or packaging.
- Review sales and profit on an ongoing basis, not just gross revenue.
- Improve listings based on performance data — conversion rate, search terms, and review feedback all point to what needs fixing.
An Indian manufacturer who's already selling successfully through distributors offline will find that moving to marketplace selling changes quite a bit — pricing transparency, direct customer feedback through reviews, faster expectations around delivery, and the need to actively manage a listing rather than relying on a distributor relationship. None of this is a reason to avoid Amazon, but it is a reason to treat it as its own operation rather than an extension of an existing offline business.
Common Amazon Seller Registration Mistakes in India
Some patterns show up again and again with new sellers:
- Entering GST details that don't match PAN records exactly
- Business name spelling that differs across PAN, GST, and bank documents
- Using incorrect or outdated business information during registration
- Choosing a pickup address that couriers can't reliably service
- Not keeping bank account information ready and verified in advance
- Selecting the wrong product category, which can hurt visibility or trigger policy issues
- Ignoring category-specific restrictions or approval requirements before listing
- Uploading incomplete or low-quality product information
- Building weak listings with poor images and vague descriptions
- Ignoring Amazon's fee structure when setting prices
- Never calculating actual profit margins before launching a product
- Starting PPC campaigns before understanding whether the product converts at all organically
- Ignoring account health metrics until a problem escalates
- Treating Amazon as just another sales channel rather than a marketplace with its own rules and customer expectations
- Sending large amounts of inventory to FBA before testing real demand
Most of these come down to moving too fast through registration and listing without pausing to check the details — small mismatches or shortcuts early on tend to cause bigger delays later.
When Should You Use Amazon Account Management Services?
Getting your Amazon seller account set up is the starting point. What comes after — listings, catalogue updates, PPC, inventory planning, account health monitoring — is ongoing work, and for a lot of business owners, it's more than they expected to manage alongside actually running their business.
Need Help Managing Your Amazon Seller Account?
This is where a partner like Jaipur Global Services (JG Services) can help. JG Services provides Amazon Account Management Services, covering listing updates, catalogue management, order and inventory coordination, and account health monitoring for ongoing Amazon.in operations. For sellers who want advertising handled with real keyword and budget data rather than guesswork, JG Services also offers Amazon PPC management.
Beyond Amazon-specific support, JG Services provides broader ecommerce marketplace management and consulting for sellers looking to expand across multiple platforms, along with accounting and taxation support for GST and other compliance questions that come up as a business grows.
If you're deciding whether outside help makes sense at this stage, it's usually worth considering once you're spending more time managing account issues than actually growing sales — that's typically when professional Amazon seller support starts paying for itself.
Frequently Asked Questions
How do I create an Amazon seller account in India?
Register through Amazon's seller sign-up process with your PAN, GST details (for most categories), bank account, and pickup address ready. Amazon verifies your information, and once approved, you get access to Seller Central where you can start listing products and preparing your store for launch.
What are the requirements for an Amazon seller account in India?
Most sellers need a valid PAN, GST registration for taxable goods, an active bank account, a working phone number and email, and a serviceable pickup address. Requirements can vary by product category and business type, and Amazon may request additional documents during verification.
Do I need GST to sell on Amazon India?
For most product categories, yes — GST registration is generally required regardless of your turnover, since e-commerce sellers need it from their first sale under current rules. Sellers of GST-exempt goods, like books, may be able to register with just a PAN. Confirm your specific situation with a tax professional or the GST portal.
How much does it cost to create an Amazon seller account in India?
Registering a basic Amazon seller account doesn't carry an upfront listing fee. Your actual costs come from referral fees, closing fees, shipping or FBA fees, and advertising — all of which depend on your product category, price, and fulfilment method. Check Seller Central for current rates specific to your catalogue.
Can I create an Amazon seller account without a business?
Yes, individuals and sole proprietors can register, provided they meet the standard requirements including PAN and, for most categories, GST registration. You don't need a formally incorporated company or LLP to start selling on Amazon India.
How long does Amazon seller registration take?
Registration itself is often quick once your documents are ready, sometimes completing within a day or two. Delays usually come from mismatched details across PAN, GST, and bank documents, or incomplete verification steps — accurate paperwork upfront is the biggest factor in a fast approval.
What documents are required for Amazon seller registration in India?
Typically PAN, GST registration certificate (for most categories), bank account proof, and a pickup address. Amazon may request additional identity or business verification documents depending on your category and business structure, so it's worth having everything ready before you start.
What is Amazon Seller Central?
Amazon Seller Central is the dashboard you use to manage your entire Amazon.in business — listings, inventory, orders, pricing, advertising, reports, and account health. It's where the actual day-to-day work of running an Amazon store happens, well beyond the initial registration.
Final Thoughts
Creating an Amazon seller account in India is only the first step. What actually determines whether the business grows is everything after that — the products you choose, the quality behind them, how well your listings are written, competitive pricing, reliable fulfilment, thoughtful advertising, and staying on top of account health as orders start coming in. None of that happens automatically just because the account is approved.
If you're setting out on this and want support with account management, listings, PPC, or broader marketplace strategy, JG Services can help you look at where things stand and figure out what to prioritise next.